In the last part of this series, we set up the Wide World Importers database and created about a year’s worth of data. This is great to do some initial research, however it doesn’t simulate a real-world scenario. We need to have a situation where the underlying data is changing, ideally in a fashion that makes it appear like decisions are being made based on the data.
The good news is that there is a stored procedure already written that creates this data. It’s what was used to create the first year’s worth. I have included a procedure that finds the last day of data created and call the procedure for the next day. In this manner we can simulate data being generated whenever it is necessary.
The problem we run into is that the database that we chose (basic Azure MSSQL tier) does not have a mechanism to schedule procedure to run (such as the SQL Agent). We could get around this in many ways:
-
- Manually calling the procedure
-
- Using Azure Automation
-
- Use Power Apps
-
- Any other mechanism of remotely calling a stored procedure
Since we’re going to be using Synapse Analytics (or Fabric at some point), we’ll just use that, but we need to provision it.
Create a Synapse Workspace
Back in the Azure Portal, create an Azure Synapse Analytics workspace:


At this point, you can Review + create your workspace.
Connect Synapse to Our Database
We’re going to use Synapse to call the stored procedure that creates data. It’s going to need a number of configurations in order to work though.
-
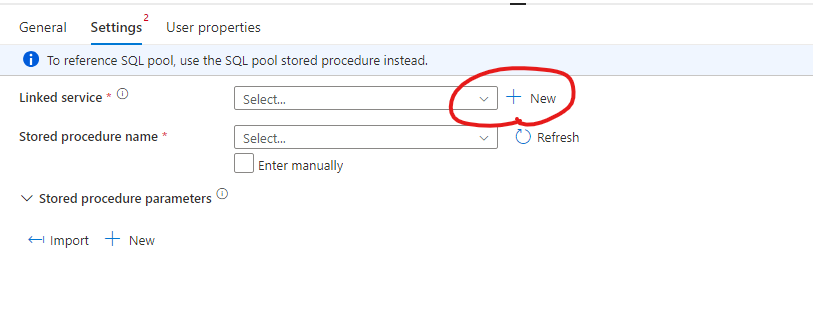
- Create a pipeline and add a stored procedure call.

-
- Create a New Linked Service
-
- Configure the connection (Note that this will fail for now)

Configure Permissions in the Database
Let’s connect to the DB using our Entra ID Login. This is required for us to add the Synapse Managed Identity, so make sure to replace your Managed Identity in the following scripts. We’ll need to connect to the master DB in order to create a login:
CREATE LOGIN [foundatum-syn-wksp] FROM EXTERNAL PROVIDER
GO
Since we can’t switch between DB in the basic tier, we need to manually change the connection. Luckily, we do not need to do this very much.
-- Create a role that has access to read any table since we're extracting data from these tables
CREATE ROLE Synapse AUTHORIZATION db_datareader;
GO

-- Create Synapse Schema for our table later on
CREATE SCHEMA foundatum;
GO

-- Grant additional permissions to the Integration Schema.
-- We'll add tables to this schema later on in this series
GRANT INSERT, UPDATE, DELETE, EXECUTE ON SCHEMA :: foundatum TO [Synapse];
GO

-- Grant access to create data history
GRANT EXECUTE ON OBJECT::[DataLoadSimulation].[PopulateOneDayOfHistory]
 TO Synapse;
 GO

-- Create a user from the Login created earlier
CREATE USER [foundatum-syn-wksp] FOR LOGIN [foundatum-syn-wksp];
GO

-- Add the newly created user to the role
ALTER ROLE Synapse ADD MEMBER [foundatum-syn-wksp];
GO
Testing the Data Creation
At this point, we should be able to return to the Synapse Pipeline created earlier and debug our pipeline activity.

Everything should work without issue now. Let me know if you have any problems.
In the next part of this series, we’re going to perform an initial copy of our data.